Showing posts with label lampwork. Show all posts

Saturday, April 27, 2013

7.3 Bead Soup Blog Party

This is my soup for the 3rd reveal of the 7th Bead Soup Party Blog, well, most of it. I got my great soup from my partner, Brandy Thomason McNair of Bella Vita Jewelry. Click here to check out her jewelry with my beads. I say this is most of the soup as I was so in love with some of the beads I made my jewelry piece before I took the photo (bracelet below). The little green chips on the top are Kyanite. I think the green rounds are jade, maybe....they were in a baggie labeled "?" along with the lovely purple stones. The focal is a faceted bamboo agate. There are some handmade charms in copper and brass and some antique buttons.
Here is a close up of the handmade charms Brandy made. I haven't made anything with these yet; I'm ashamed to say. I will use them, I promise. I think I'll add the little WA charm to my bracelet, see below.

This necklace uses the rings that Brady labeled "Vintage". I think they maybe Lucite or Bakelite, I'm not sure. I usually like to make beads to use with my focal piece and that was an issue this year. The focal bead was a lovely large bamboo agate (see below). It is a lovely white stone, but with a lot of grey. I made at least three sets of lampwork beads to go with it and they did not match at all. The beads above were they 3rd set I made. I used silvered ivory glass to get the grey and yellow colors, but they were just too dark, but I thought they looked great with the warm yellow rings. Brandy also sent a copper clasp, so I wired wrapped the beads with copper wire and used a long copper chain. I added rings of coiled green wire to bring out the green in the beads. I think I should have either gone without the rings or more asymmetrical (but I have a really hard time making asymmetrical items).  The cain doubles through the rings so there is a length option. I used my torch to patina the copper with fire for blues and purple colors, but it didn't really stay on the wire when I manipulated it. I think I may patina with either LOS or vinegar. I'm not sure if the green/blue color made with the vinegar will clash with the green in the glass beads (I can always change out the green coils to match better or use a contrasting color or take them out all together).

Here are the stones and antique button I snatched out of the package and made into a wrap bracelet immediately. So quickly that I have misplaced the baggie that had the name of the stones. Brandy, little help with these? I just love them.


Here is my focal bead, the bamboo agate. It is so lovely and I'm not happy with what I have done. I focused so long on making matching beads, I kind of didn't come up with other ideas.  I have not done any wire wrapping before, so I took a shot. I think the shot missed by quite a bit. Oh boy, what a sad little pendant.....  Of course, I should have used the stones I used to make the bracelet, look how perfect they are together...


Many thanks to Lori for organizing the blog hop and CLICK HERE to find all the other blogs.

Tuesday, April 16, 2013

Honey Mustard vs Opal Yellow


Another color testing thread from me. I read a post by DragonJools about a newish color from CIM called Honey Mustard. As soon as I could get some I ordered it from Frantz. I was intrigued by her comments about Opal Yellow and this color having some of the similar properties, especially with EDP. I made some of these lentils that I last made in 2006. What I liked about these beads is that the EDP reacts with the Opal Yellow to form a bright orange color where they meet. In this set the center three beads are made with Opal Yellow and the three on the far left are Honey Mustard (the three on the right I can't remember). I think the bright yellow and orange color is similar in both, but a tad more orange on the Opal Yellow. The Honey Mustard didn't get as pink as the Opal Yellow, however, because I can't tell on the other three, it is really close.   Click on the photo to find these beads on Etsy.


Here is a focal on the left with the Honey Mustard (HM) and Intense Black IB) and the other two are some older Opal Yellow (OY) and Intense Black beads.  It is a little hard to compare these exactly as I find that Intense Black worked differently on my Hot Head torch that I know the 2004 bead was made on (can't remember on the 2007).  I found that the IB didn't web as much on the HM, but more like a spreading all over the bead. You can see some cool blue and green colors on the HM bead and I think that is worth trying to replicate. You can see similar colors on the top OY bead.  The yellow colors are very similar and I did get some pink blush on the HM bead, which is encouraging.


 I am not an official color testing for any glass companies, so my opinions are mine alone.

Sunday, March 24, 2013

Color Comparasion

I bought a newish color from CIM called Laguana. I tested it against Mermaid. It is so smiliar, I'm not sure it is worth getting both colors (especially when the price at Frantz for the Laguana is more than the Mermaid)..  The mermaid is on the left on these beads and the Laguana is on the right. I would say that Lagunana is an odd lot of unique Mermaid . It is about 1/2 shade lighter than Mermaid. It is, as most of the CIM colors, nice and creamy and buttery soft.  It is a lovely color.

Wednesday, November 9, 2011

YAY, my beads on Art Bead Scene


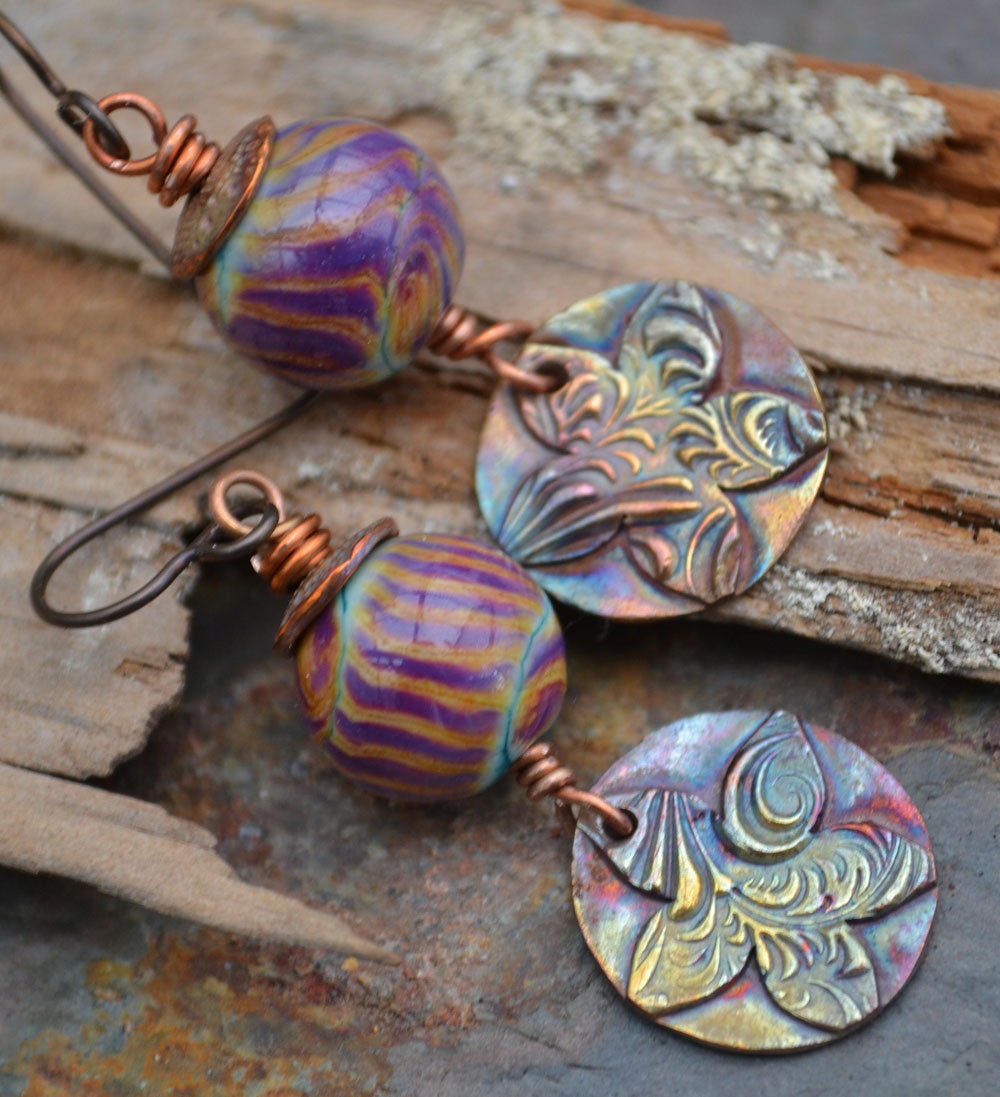
Kinda late to post this, but how excited was I to see my beads on the very cool blog on 10-27-11: Art Bead Scene! Now, they did not get there on their own, but in a really beautiful pair of earrings by Kristi Bowman, see above. Kristi stopped by my booth at the Northwest Bead Society's Bead sale a few weeks ago. She makes these really cool copper findings and just stunning jewelry. Check out her blog HERE and her Etsy site HERE.

I especially like the earrings below (they have already sold, but heck, I would buy those beads back just like this).

Friday, September 16, 2011

Bead Soup Party Blog Show and Tell Day


My bead soup came from Deci Worland (Blog and Etsy). I was able to make three items and have beads left over. She sent a super cute beetle focal. It is ceramic or clay. Deci said: "The focal is from Andrew Thornton, I am not sure if he made it or someone else. The smaller handcrafted beads are from Jardanne." I don’t know if that is the glass beads or the cool enameled bead. If anyone knows let me know. Deci choose colors that I love, thanks Deci! I really like the bright green color and purple is my favorite. The base color of the focal bead is a deep purple almost black.

I am a lampwork bead artist and I wanted to incorporate my beads into the piece. There are several colors of glass that come close to the color of the beetle background and they all have a neat finish. I made TONS. The color I liked the best did not match at all. I ended up with a lot of beads that looked similar and they are purple or black with a slight iridescent finish. I had a hard time picking them apart and now when I look at the finished piece I can pick out the ones that don’t match the others. Darn it! I’m not sure if it looks OK all mixed up or not. For those that are interested I used Dark Silver Plum and Gunmetal. The color that did not match was Dark Metallic Black.

Deci sent a cooper clasp and these cool puffy copper triangle beads. I need to get more of these, they are so fun! I choose the lightest and brightest green gem beads. I think they maybe moss agate. I anyone knows, please let me know.

I used some bright green seed beads to attach the focal and clasp to the necklace.


Green and purple are a classic combination and I wanted to use these fun shaped purple beads in earrings. I couldn't decide if they should be on the top or the bottom of the earrings, so why not both!


Finally I used the black gem beads (these have a very faint strip of grey/white which is more evedent in some beads that other, but didn't show up in the photo.) I paired these with some bead caps and sterling findings for these cute earrings. I don't know what these gems are, but would like to know I have several left. I think it might be black agate.

I had a great time with the Bead Soup Party. I hope to participate in the future. Many thanks to Deci for sending my beads and huge thanks to Lori for organizing the party.


There lots of blogs to visit for the Bead Soup Blog Party. There are 362 blog particiapants from five contients and 21 contries.

Check them all out here.

Monday, August 22, 2011

Are Gaffer 198 and 199 new Zimmerman 99? (Also a comparison between the Gaffer colors and the recent new Reichenbach color R733 and Z99).


I received some samples of Gaffer’s new glass to work with this week and I was super excited. The new colors are Gaffer 198 Royal Purple (G198 on the top above) and Gaffer 199 Purple Rose (G199 on the bottom above). I am always excited by the possibility of new colors. With the very cool Zimmerman 99 Purple Rose Special (Z99) no longer being made, it is neat that the other companies are trying to create something similar. Even if not exactly the same, they are all pretty cool on their own.


I found both new colors VERY SOFT. As I work fairly hot, this can be interesting. I also found the Gaffer glass some how less think or less sticky than the Zimmerman. Not sure how else to describe this. I have read on some Facebook and LE posts that this glass does not devitrify. Well, that is not the case, it does, just like Z99 and R733 and EDP. I find that all of these 96 COE purples do not devit as badly as EDP and the shiny is very easily recovered by heating up the bead. I found G198, R733 and Z851 devit the quickest. I got devit on these purple colors only after cooling and reheating and it is worse when cooled with a tool.


Above you can see a group of beads from each of the new Gaffer colors. You can see the G198 as more red undertones and the G199 is bluer. I like the blue better. Not just because it is closer to the original z99, but I like a blue purple over a red purple. In each grouping you can see a set of solid colored spacer beads on the left hand side, these are were cooled quickly (as was the chubby focal in the G198 set). After talking with Gaffer, I was told to get more color use a cool slow down, not quick with tools. The other two focals of the G198 group and the one in the G199 group were made with this slow cool down. I formed the bead, shaped it, then let it cool down, then spot reheated, let cool and reheated again, I got more colors to develop this way. I even got some peach on the tall barrel bead. The pinker spacer beads in the front of each photo were also treated this way.

FOCALS
Above is Z99 frit on Opal Yellow Effetre (OY) and shaped with gravity. You can see a lot of orange and red forming. Also seen here is the pitting I got a lot when super heating furnace glass frit. You can see this more on the bead below. Find this bead on Etsy.


G198 on Opal Yellow. Bead shows the reaction between the purple frit and Opal Yellow being medium orange.. You can see in this bead some lighter areas of color, this is devit (I could not heat it out without getting rid of the raised twist. I actually like how it looks. It adds some texture to the bead. G199 on Opal Yellow. You can see the blue showing up on this bead and a little bit of reaction between the frit and the Opal yellow. I like that the dark yellow hasn’t taken over the entire bead. I think because it was not worked as long as the G198 or Z99 bead.


R733 frit on Opal Yellow and shaped with gravity. This bead has a lot of blue left over and not as much mustard. Again, I think if it was worked longer, more dark yellow would have developed, you can see it starting on top. Check out this bead on Etsy.

ROUNDS


All of these round beads were made the same way: a twisty of Opal Yellow and the purple color on top of Copper Green Effetre. These were the first beads I made with this technique and they are the Z99. This is what is so cool with this glass, you can do the same technique and the same colors and get something different. You can see here more yellow that orange and that one bead with the fuchsia.

On the R733 beads the Opal Yellow turned very mustard, much darker than the Z99. I think they are not as pretty as the Z99 beads, but still very interesting. A couple of the beads didn’t turn mustard at all (they are hiding in the back). Check these out on Etsy.
These G198 beads were made before I heard about the slow cooling. I made these beads, shaped in the roller tool, heated to get the chill marks off and then put them in the kiln. As you can see they have a lot of mustard/orange, no blue and lots of pits.
These beads made with G198 show a lot more variation in color than the original set. With these I shaped in the roller, then reheated, cooled and reheated to get the colors to bloom. Still a lot of orange reaction color between the OY and the G198.
These beads used G199. You can see a lot more blue and light purple variations in these beads. In fact these are the areas that devitrified (but has been reheated to a shine). This is the type of reaction I like to see with these purple 96 COE glasses. Also there is not as much orange than the previous beads.
Here is a bead I made with all the colors of purple I have. I think I have the lines drawn correctly on this bead, but it was a little hard to find the difference between the G199 and R733. I think that it maybe the line below the black line, but I really can’t tell. As you can see the G198 really looks redder in this photo. Typically my Z851 is bluer than seen here too. Just goes to show you that the colors are pretty close to each other. Finally I have a side by side comparison of beads made separately. Top = Z99, 2nd from top = R733, 3rd from top = G199 and bottom =G198


Conclusion – I think G198 is the most similar to Z99, but I love having the variety of colors the play with and there is a color that will work for everyone’s like and style. Pick one you like and have fun. I think


Tuesday, August 2, 2011

At the Gathering Vicariously - Surface Exhibit


I was unable to go to the Gathering this year, but a little bit of me was there, this bead! The Gathering is the annual convention of the International Society of Glass Beadmaker (ISGB) and this year was held in Louisville Kentucky. I have been twice before (Portland and Oakland) and am super super super excited that in one year (almost to the day) the Gathering will be here in the Seattle area. I can not wait! Seeing people that I haven't seen in several years, learning new techniques, selling at the Bazaar, volunteering with my local chapter, seeing great demos and hopefully taking some classes. Can you tell I'm excited??? I'm so stoked that I have my vacation request filled out at work ready to turn in the first day we can turn in for next summer (pathetic I know).

Back to this bead........

This bead was included in a juried exhibit called: Surface. The instructions for this exhibit boiled down to make something under the surface or on top of the surface of a bead. Sounded like a open call to me. I have this cased bead with a murrini on top. This is the first bead I have made specially for an exhibit. In the past I had submitted beads I already had on hand. I made this bead and this bead only and it turned out great!


My beading buddy Donna was so sweet, so took some photos of the exhibit for me. My bead is the second from the left on the right sided podium.


The venue looks really nice. Someplace I would love to look around in.


Monday, December 27, 2010

LOTS of Beads

I had the week of Christmas off. Did I travel to visit friends or family, nope but am waiting for nephew and sister to come next week - YAY. What I did do is make LOTS of beads. This pile doesn't look that tall, but it was. Look for new focals and set coming soon. Also on the sales front, I closed my website. I was not getting the sales there to keep paying out so much each month/year. New beads are exclusive to Etsy and ArtFire.

Tuesday, November 23, 2010

Sale on Glass Beads - Black Friday Cyber Monday Deals

I'm gearing up for the weekend sale early this week. I'm starting early as I have the time today and tomorrow to start editing my listings on ArtFire and Etsy. ArtFire as such a great interface, those are all done and ready to go.


Christmas Scrolls

On Etsy use coupon code "BLACKFRIDAY2010" for the 10% off. Of course, if you forget, I'll refund the 10%

This week (till next Monday), everything in my ArtFire and Etsy shop is 10% off and free shipping.


Christmas Wreath

ArtFire is already marked down and prices reflect the 10% off. I'm working on my Etsy shop current, will edit this when done.

Check out all my glass beads for perfect stocking stuffers or holiday gifts.
My ArtFire and Etsy Team, The Fire Divas, have any members also offereing deals. Check out our blog for more information. While there, make sure you vote in the November Holiday Challange.

Thursday, November 4, 2010

October Sales and Donations


As I posted on a previous blog update, I was planning on donating 20% of my sales on ArtFire in the Month of October to the National Breast Cancer Foundation. I was hoping this would boast some sales on ArtFire (more sales for me, more money for the NBCF). Well, I had more sales. I had three. Kinda sad, but the previous month I had none. My total in sales was $55 which meant $11 for the donation. That sounded pathetic and sad, so I matched the donation for a grand total of $22. Still kinda sad, but every penny counts, right? Look for an upcoming post to see what all the fire divas raised together.

Here's my proof for all those that must know.


Sunday, October 10, 2010

Self bragging!


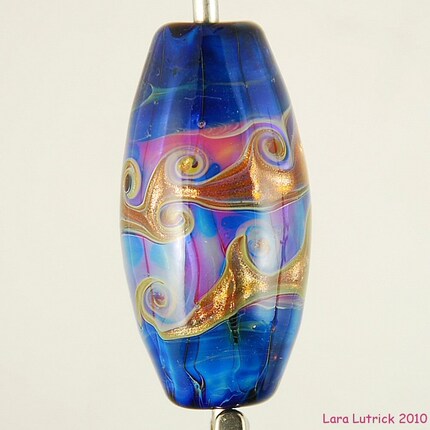
Just a little bragging on myself. I'm super proud of these two beads, they are so pretty! My local bead group had a challenge for our meeting today and the theme was goldstone. I used hand pulled goldstone ribbon on Clio. Base of beads has Opal Yellow in the center and Colbalt on the ends and all is cased in clear. Click on the photo to get to the Etsy listing. Or here for my site.

Saturday, February 6, 2010

FUN WITH BUTTONS


Choosing a button for last week's Fire Divas' Bead of the Day last Friday made me think about buttons and beads and what is a bead? Can a button by a bead or a bead be a button?

I don’t make a lot of buttons, but do enjoy it when I get a decent one made. For me, buttons are a challenge to make. I like a symmetrical round button and the nature of making a button, makes this more difficult than making a bead.

There are primarily two types of lampwork buttons: shank (glass and metal) and holes. There is another option, a normal one holed bead (usually a disc type) used as a button. Lampwork glass buttons can be used for: closures for sweaters, jewelry, and purses accents on hats/scarves, etc.
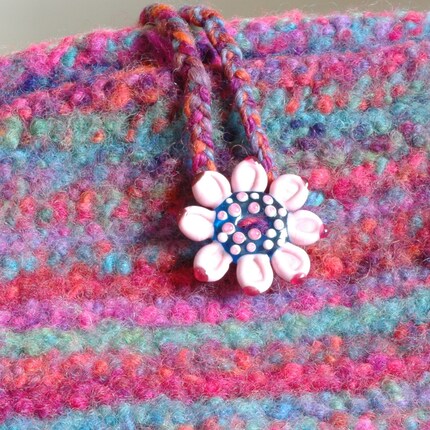


Check out this button closure on this felted purse. Nicole Valentine is showing it in her button listings on Etsy to give ideas on how great her buttons look. She has a wonderful selection of beautiful flower buttons. Check them out.

What should you look for in a button?

It is not very different than a bead, but a few extra things that I think about when I’m choosing a button to use.

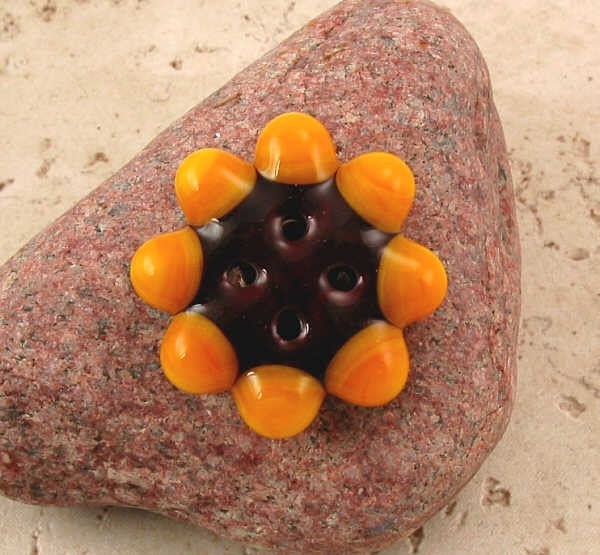
Make sure the buttonholes are smooth without jagged edges. This is especially important if you are using your button as a closure for knitwear or fabric. A rough edge can even cut through wire beading materials. The holes in this sew-on sunflower button by giapet are nice and smooth. See how the holes dimple towards the base. This makes for a nice and smooth edge for the stringing material. If the button is made on a mandrel, make sure the holes are cleaned of the bead release. When beads and buttons are made on a mandrel, they are made over a thin metal rod (mandrel) coated with a ceramic paste called bead release. This release will break away from the metal and allow the bead/button to slip off the mandrel. This process makes the hole in the bead/button and artisian glass button makers will clean their hole of this powdery substance. Certain buttons are made without a mandrel and therefore will not have the release. See more information on shank buttons below.
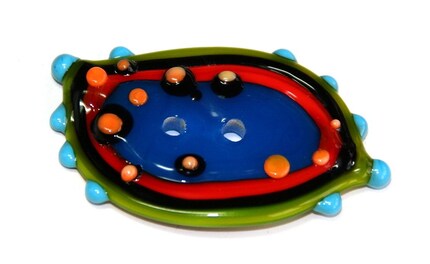
Button by Linda Lawrence of Bella Bead Jewelry on Etsy.


Make sure the holes are large enough to get your stringing material through. Thin Softflex will fit through most holes, but a chunky yarn may not. Button makers should list the size of the holes and if they don’t, ask them, they would be happy to tell you.
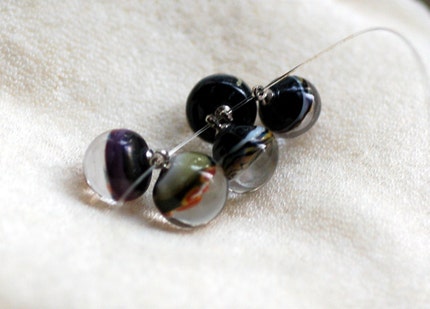


Metal Shank Buttons by WildBird on Etsy.

The button should be annealed. Artists will usually mention that their button is annealed, if they don’t, ask and a responsible artist will tell you if they annealed their item. Annealed is the process of soaking the item in a kiln to slowly cool the glass down. This allows the stress in the glass produced during manufacturing to be reduced and decrease the risk of breaking. However, glass is brittle and could always break if the stress is right, so be careful with your buttons (for example, remove them when washing a garment).

Look for raised designs (such as dots and scroll work) to be melted in enough. Just like on beads, the designs should not have an undercut. Undercuts leave less glass-to-glass attachment and could cause the design to break off. If your button going to be getting heavy use choose a design with melted in elements. Check out the wonderful dots on this button by Tera Belinsky-Yoder (aka Beadygirl Beads).
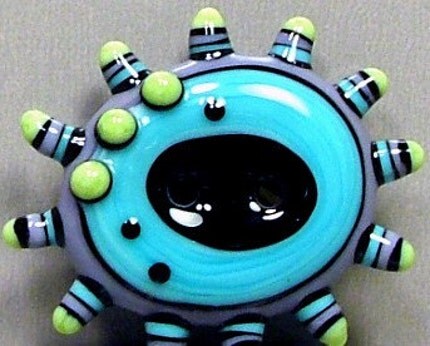
The design of the button should be useful to your project. I like making raised dot buttons (the first button on the post is mine) however, on a garment with loose weave yarn, a raised dot design may get wrapped up in the yarn and be irritating to undo all the time. If this is a concern, choose a smooth round button. Do you want a button to match a whimsical design? If so, look for a button that is in a different shape or character (like a fish, flower).

What size do you need?
Make sure the artists have accurately measured the button. Will it fit the hole in the fabric/weaving? If the photos are not clear, ask the artist, they should be willing to clarify the measurements for you.

What type of shank does the button have? There are two possibilities: glass and wire. Metal wire shanks are shaped into a U and then plunged into the molten glass during the manufacture or glued on the back with epoxy, or those really cool shanks above. The metal shanks should be smooth and without rough edges (like glass can be). The metal shanks can be different sizes and maybe easier to sew onto a garment.
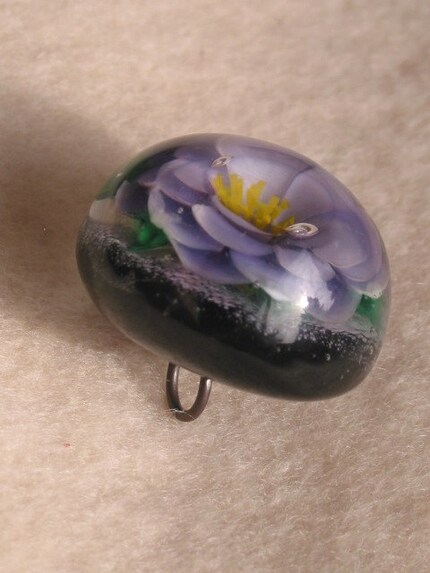
Metal Shank Bead by karenemlquist on Etsy.

Glass shanks can be made on a mandrel or free formed into a loop without a mandrel. Glass shanks made on mandrels have consistent hole sizes and (for me) it is easier to get similar shapes and sizes of the button and the underlying bead. This type of shank will have the bead release and may have rougher edges than other types of shanks.
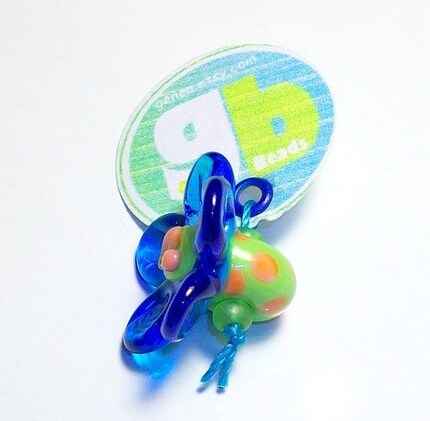
Button with bead shank by Genea on Etsy.

Glass loop shanks should have very smooth holes as they were made with a string of molten glass. For me this is the most difficult type to make, but other artists are much better. These holes, again speaking from my experience, may be inconsistent in size and shape. However, they look the most “finished” to me. Other's opinions may vary. Below is a glass shank button made by me.


Can that bead you bought be used for a button?
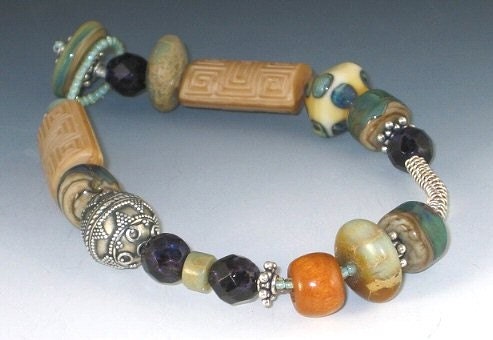

Sure, but there are a couple things to think about. I use disk beads for buttons as seen in the closure of my bracelet above. When using a bead you want to make sure there is enough glass around the hole to hold your buttonhole or other closure type so that it doesn’t slip off. If you have a tiny bead, it might not stay closed. To use a bead thread your stringing material from the back of the bead and use a smaller bead to catch the thread, then go back through the hole to secure.
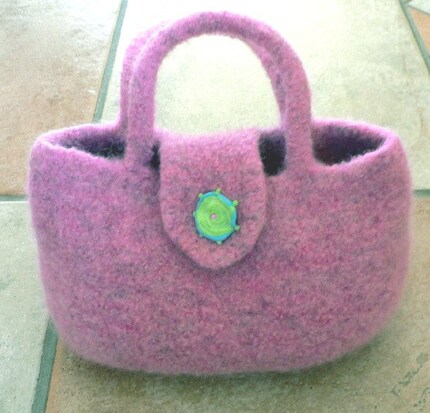
Felted purse with disk bead closure from MandaJ on Etsy.


Can I use a button in Jewelry?


This stunning bracelet is by Cassie Donlen. She has it as an example of how to use her buttons. In researching this article, I found her buttons to be the prettiest for me. They are stunning.


Check out her buttons here.