Monday, September 22, 2014

Color Testing - Gaffer Clear


I'm super late to review this new clear glass I got from Gaffer. Last Nov I got a sample clear that was great over non reactive colors, but not so good with silver infused glasses from Double Helix. See my post here:   I made several new samples to compare and the new clear is much better. I see much less difference in the colors. The major issue with the previous batch was that the clear reacted with the clio and turned very green, see the link.

One the top bead the color above the goldstone is Double Helix Zepher and the bottom is the Gaffer. I see very little different here, slightly green on the top, but also on the bottom.

The 2nd bead shows Gaffer on the top and Zepher on the bottom, you can see there is more green for sure.

Saturday, July 19, 2014

More Pantone Fall 2014 Colors, Easier to see colors

More Pantone 2014 colors to mimic the fall colors.  These show the colors better than the disks in the previous post. My goal with these set was to layer transparent and opaque colors for added depth. Colors from left to right.

For aurora red I used Effetre red transparent (#076) over white. I think the aurora red is a bit more orange, but since this red is striking and can sometimes have yellow/orange overtones it was fitting, but turned out bright and rich.  I'm not sure which color would be closer in a transparent red, any ideas would be welcome. 


For sangria I used Bullseye cranberry (#1311) over petal pink (#421).  I found this combination one of the the most successful matches as far as matching the Pantone color.

For radiant orchid I used Effetre purple premium opaque pastel (aka EDP, #254). There is no other color to use in my mind to match the color of the year. This color also doesn't lend itself well to casing, so no transparent glass in these beads. 


For the aluminum I used Effetre gray steel (#084) over Effetre gray pearl pastel (#268). I should have used just regular transparent gray. The steel gray is too blue.   I was disappointed that it doesn't match the Pantone color, but I do prefer this gray.

For the mauve mist I used Bullseye mauve. I can't find this on their website and it looks like it is no longer available, but it is a perfect match to my eyes. This was one of the colors that I didn't have a transparent mauve to case it with, but in this set I used clear, which lightened the color. Unencased is better match to the Pantone color


For the bright cobalt I used CIM trade winds (#51123). This colors is very dense, so  I cased white with the trade winds, then to damp down the color, cased in Effetre Gray.

For cypress I used Effetre sage transparent (#019) over Effetre sage opaque (#211).  I was really happy with this combination.
For the misted yellow I used CIM honey mustard (#511306) this set cased with Effetre yellow transparent (#008)/ This combo is OK, it doesn't match as close as I thought it would before I melted the glass, but it is a pretty color. 


For cognac I used CIM maple (#511780).  For the round beads I used it over Effetre sage.


Sunday, July 13, 2014

Pantone 2014 fall colors and lots of work.


I had the last two weeks off for vacation, but I really didn't take a vacation, I just worked at my second job, making beads. I really like my normal job, nursing, but lampworking is so much fun and I took the opportunity to make beads for my upcoming show, Tacoma Bead Bash. For the last few shows I have made a rainbow of bead sets with the typical ROYGBIV color wheel, but for this show I figured I would use the Pantone 2014 colors for my inspiration. On the Pantone chart I saw some colors I knew which glass colors I would use right away, but others, I was not sure. I also wanted to use transparent colors to layer if I could.  Some of these colors didn't lend themselves for layering, but most did. For these disks, I did not do much layering, but have included the colors I used below for other beads, photos to come in the future. In addition to these disk beads I made 4 sets of round beads with six beads each (minimum). I finished my sets today. Whew.

Below I have from the left to the right the colors I used on my disks in the photo above.

For the aluminum I used Effetre gray steel (#084). I should have used just regular gray. The steel gray is too blue. I had thought I was using the regular, but when I was done, noticed it was the steel.   I was disappointed that it doesn't match the Pantone color, but I do prefer this gray. In my round beads I used the gray steel over Effetre gray pearl pastel (#268).


For the bright cobalt I used CIM trade winds (#51123). This colors is very dense, so on round beads I cased white with the trade winds, then to damp down the color, cased in Effetre Gray. For the disks I did not do this, but you can see the color here peeking out here and there. 

For aurora red I used Effetre red transparent (#076) over white. I think the aurora red is a bit more orange, but since this red is striking and can sometimes have yellow/orange overtones it was fitting. I think Effetre light red opaque would be a good opaque color for aurora red. 

For cypress I used Effetre sage transparent (#019) (in my round beads over Effetre sage opaque (#211).  I was really happy with this combination.Over cream and ivory in my disks above, it look much brighter.The cypress is a bit more yellow than the sage, I'm wondering if casing the sage in yellow or topaz would get a better matching color.

For sangria I used Bullseye cranberry (#1311) over petal pink (#421).  I found this combination one of the the most successful matches as far as matching the Pantone color. I just love Bullseye pinks, they sparkle like crazy. 

For cognac I used CIM maple (#511780).  For the round beads I used it over Effetre sage. Unfortunately I had some compatibility issues with this combination and will need to remake the beads with a different base color. Here the glass over ivory or cream looks very yellow (4th form the right). Not as much in person. I think it must be the camera or lights. The combination of the CIM maple over sage is a nice brown, but a bit too dark for the cognac. I'm thinking woodie (#755) or Choco-Latta (#727) (if you still have it) might be better. Cognac has a lot of red/pink to me.

For the mauve mist I used Bullseye mauve. I can't find this on their website and it looks like it is no longer available, but it is a perfect match to my eyes. This was one of the colors that I didn't have a transparent to case it with, but when I did I used clear and it lightened the color a lot. Unencased was better.

For the misted yellow I used CIM honey mustard (#511306) cased with Effetre topaz light transparent (#012). The topaz is a bit too brown, but when I used Effetre yellow transparent (#008) it was a bit too light (and has a green tinge weirdly). This combo is OK, it doesn't match as close as I thought it would before I melted the glass, but it is a pretty color. The honey mustard is a dead ringer for misted yellow before it is heated. I did find the it is very very close to Effetre opal yellow, my all time favorite color.

Finally I used Effetre purple premium opaque pastel (aka EDP, #254). There is no other color to use in my mind to match the color of the year: radiant orchid. This color also doesn't lend itself well to casing, so no transparent glass in my sets.

Bead show is August 15-17th 
Freight House Square - Rainier Room
(Close to Tacoma Dome)
430 E. 25th St., Tacoma, Wa 98421
$3.00 Admission & Free Parking


Saturday, November 9, 2013

Color Testing - Gaffer Clear

A couple weeks ago the Gaffer Gals from Gaffer Glass USA had a booth at the Northwest Bead Society Bazaar and they brought samples of their new 104 COE Clear. They wanted us to check it out and I got to my torch is try it out. The striped beads above are CIM commando, peace and Effetre medium red cased in Gaffer Clear. It had a nice working consistency. It was butter soft and melts really smoothly. I didn't have any scumming, but did some little seed bubbles, but they seem to have disappeared once on the beads.It has nice optic clarity and depth.

I have to say that so many lampworkers use the silver glass from Double Helix, Precision, TAG, etc that I really wish that this clear worked better with the silver colors. It turned my Clio green.  I had very limited amount of sample, so I only used it over clio. I'm not sure how it reacts with other silver colors, but suspect will be similar given how silver colors are made. The beads below on the left side are the Gaffer clear over clio (which is over opal yellow). For some reason it was super hard to catch the green in the photo, but the bead on the top is even more green than on the photo. The larger bead on the bottom has significantly less green so much so that you can barely see it, but is over all "muddy" to my eyes, like there is a greenish tinge over the bead. If worked right, it could be ok if you could control the green.  The center of the large bead is partially the opal yellow showing through and is enhanced by the green tinge.  On the smaller bead the top has a green cast over the pink, which gives an OK color to the clio, but the bottom is full on chartreuse green (much more so in person) and it is metallic in real life as well. Really ugly, muddy and not sell-able. It is the same issue that Aether gives with clio, I hunted  for a photo and finally found one, on the right below. At the very bottom is Clio with Effetre clear or zephyr and it is the bright pink we know and love.

Finally thoughts: YAY nice clear over regular colors, NO over Clio. 

I don't know when this will be available nor the price, but if a decent price, will get for casing non silver colors.


Saturday, April 27, 2013

7.3 Bead Soup Blog Party

This is my soup for the 3rd reveal of the 7th Bead Soup Party Blog, well, most of it. I got my great soup from my partner, Brandy Thomason McNair of Bella Vita Jewelry. Click here to check out her jewelry with my beads. I say this is most of the soup as I was so in love with some of the beads I made my jewelry piece before I took the photo (bracelet below). The little green chips on the top are Kyanite. I think the green rounds are jade, maybe....they were in a baggie labeled "?" along with the lovely purple stones. The focal is a faceted bamboo agate. There are some handmade charms in copper and brass and some antique buttons.
Here is a close up of the handmade charms Brandy made. I haven't made anything with these yet; I'm ashamed to say. I will use them, I promise. I think I'll add the little WA charm to my bracelet, see below.

This necklace uses the rings that Brady labeled "Vintage". I think they maybe Lucite or Bakelite, I'm not sure. I usually like to make beads to use with my focal piece and that was an issue this year. The focal bead was a lovely large bamboo agate (see below). It is a lovely white stone, but with a lot of grey. I made at least three sets of lampwork beads to go with it and they did not match at all. The beads above were they 3rd set I made. I used silvered ivory glass to get the grey and yellow colors, but they were just too dark, but I thought they looked great with the warm yellow rings. Brandy also sent a copper clasp, so I wired wrapped the beads with copper wire and used a long copper chain. I added rings of coiled green wire to bring out the green in the beads. I think I should have either gone without the rings or more asymmetrical (but I have a really hard time making asymmetrical items).  The cain doubles through the rings so there is a length option. I used my torch to patina the copper with fire for blues and purple colors, but it didn't really stay on the wire when I manipulated it. I think I may patina with either LOS or vinegar. I'm not sure if the green/blue color made with the vinegar will clash with the green in the glass beads (I can always change out the green coils to match better or use a contrasting color or take them out all together).

Here are the stones and antique button I snatched out of the package and made into a wrap bracelet immediately. So quickly that I have misplaced the baggie that had the name of the stones. Brandy, little help with these? I just love them.


Here is my focal bead, the bamboo agate. It is so lovely and I'm not happy with what I have done. I focused so long on making matching beads, I kind of didn't come up with other ideas.  I have not done any wire wrapping before, so I took a shot. I think the shot missed by quite a bit. Oh boy, what a sad little pendant.....  Of course, I should have used the stones I used to make the bracelet, look how perfect they are together...


Many thanks to Lori for organizing the blog hop and CLICK HERE to find all the other blogs.

Tuesday, April 16, 2013

Honey Mustard vs Opal Yellow


Another color testing thread from me. I read a post by DragonJools about a newish color from CIM called Honey Mustard. As soon as I could get some I ordered it from Frantz. I was intrigued by her comments about Opal Yellow and this color having some of the similar properties, especially with EDP. I made some of these lentils that I last made in 2006. What I liked about these beads is that the EDP reacts with the Opal Yellow to form a bright orange color where they meet. In this set the center three beads are made with Opal Yellow and the three on the far left are Honey Mustard (the three on the right I can't remember). I think the bright yellow and orange color is similar in both, but a tad more orange on the Opal Yellow. The Honey Mustard didn't get as pink as the Opal Yellow, however, because I can't tell on the other three, it is really close.   Click on the photo to find these beads on Etsy.


Here is a focal on the left with the Honey Mustard (HM) and Intense Black IB) and the other two are some older Opal Yellow (OY) and Intense Black beads.  It is a little hard to compare these exactly as I find that Intense Black worked differently on my Hot Head torch that I know the 2004 bead was made on (can't remember on the 2007).  I found that the IB didn't web as much on the HM, but more like a spreading all over the bead. You can see some cool blue and green colors on the HM bead and I think that is worth trying to replicate. You can see similar colors on the top OY bead.  The yellow colors are very similar and I did get some pink blush on the HM bead, which is encouraging.


 I am not an official color testing for any glass companies, so my opinions are mine alone.

Sunday, March 24, 2013

Color Comparasion

I bought a newish color from CIM called Laguana. I tested it against Mermaid. It is so smiliar, I'm not sure it is worth getting both colors (especially when the price at Frantz for the Laguana is more than the Mermaid)..  The mermaid is on the left on these beads and the Laguana is on the right. I would say that Lagunana is an odd lot of unique Mermaid . It is about 1/2 shade lighter than Mermaid. It is, as most of the CIM colors, nice and creamy and buttery soft.  It is a lovely color.

Thursday, February 7, 2013

Aspire to Wire #14 Corralled Bangle

This is my "Corralled Bangle" from my Aspire to Wire course. I am way behind as I caught the crud last week. I finally got to this one. It is really cute and I just love it with my chevron necklace. I was worried that the bracelet would not fit my wrist, which I suspect is larger than the bracelet was designed for, but I wanted to make it to see how much larger I needed to go. I am out of 16 gauge wire so I used. 18 gauge. To my astonishment, the bracelet is PERFECT for my wrist. It is the most perfectly sized bracelet I have ever made (I typically make them too large). The only thing I don't like is that the support silver pieces are too long. I think next time I would use a shorter wire or larger loops (or try fine silver and ball the ends (which would be hard on the one side...)

Wednesday, January 23, 2013

Aspire to Wire Day #13 - Chevron Pendant

I am a little backed up on my Aspire to Wire projects, but here is Day 13, a chevron pendant. I'm the first to admit, I don't get the whole big deal with chevrons. Sure, it is an ancient symbol, a military rank symbol, and  apparently an architectural word (which was new to me).  I'm not a big fan in jewelry and it seems that I am seeing the chevron pop up everywhere these days in jewelry. When Kerry included her Chevron in the e-course I was a bit disappointment. I thought: "I'm not going to wear this, it isn't my style." But, since I'm trying to push my boundries and make as many of the projects as I can (there are a couple that I don't have the tools for), I thought I would make it.

Guess what, I love it! Kerry had an Ombre version in the instructions and I had almost the same colors so I made it and I should have worn it today, it totally matched my scrub top.

It wasn't the easiest wire project I have done, but once I finished it was a very satisfactory project. Kerry has great instructions and is a great motivator.

Sunday, January 20, 2013

Aspire to Wire Day #11 - Biker Babe Earrings


I'm a little behind in projects and postings on my Aspire to Wire e-course. Day 11's project was called Biker Babe Earring. I was glad to see the project as I had a lot of these horseshoe loops from the bracelet I made (see below). Kerry's earrings had a very long top piece that hooked to the earwire. 


These were already HUGE compared to what I normally wear, so the top arch in the original was just too much for me (also the shape was not my style). So, for the top piece I made a round wire the same size as the central circle, then made a loop in the center and used that to hold the ear wire, snipped most of the wire off and attached it to the center wire. I'm pleased with the shape. Still had tons of chipping with this color of wire. Photo with iPad, not the best quality, sorry. 

Also I made another bangle, this time with a button that had been languishing in my Etsy shop. I LOVE LOVE LOVE how this turned out. 
 

Tuesday, January 15, 2013

Aspire to Wire Day 8 - The Big Bang Bangle


Day 8 in my Aspire to Wire e-course and this is my favorite project so far. A three strand bangle bracelet with three coils and a bead. I am so happy with how my bangle turned out. I choose the bead from my stash (was going to be a ring at one point) then picked some colored wire in the same family. The colors are not an exact match and the dark purple and ivory stripes don't really flow with the the subtle tones of the bead, but I don't care. I'm going to wear this bracelet and make tons more! Thanks Kerry.

Sunday, January 13, 2013

Aspire to Wire Days 5 and 6

This handmade chain was day six of Aspire to wire. It is a  horseshoe shape with loops at the end that connect the loops together. I had some issues. I used colored wire and a lot of the color chipped off. I also hammered the rounds too much, so the large loops didn't really fit through the smaller loops. Next time I made it, I will not hammer as much and maybe make the loops a little larger. Here is is paired some with of my beads. I didn't like the amount of chipping I was getting, so instead of making a necklace, I stopped at a bracelet size for myself. I would like to see this done even smaller, it would be stunning, but a lot of work.


Day five was this  Cagey Coiled Clasp.  Check out the size of that thing?!?  I used the original measurements given, but in t he future I would make it much smaller. I don't think Kerry's look quite this big. The second cage was much better than the first I this has a lot of fun potention.

Thursday, January 10, 2013

Aspire to Wire Days 3 and 4


I have day 3 and 4 of my on line wire class. You may have noticed that I have skipped day 2. That project is a little out of my comfort zone and I'm waiting on some supplies. I think I tackle it this weekend, maybe when watching the Seahawks game. 

Day 4 is the earrings above. Kerry posted this project this morning and I could not wait to get home to give them a try. I made the little black and white heart and paired it with a magenta coil. The arrow back end  needs some work, but you can see it is better than yesterday's day 3....

I made a shall pin. Kerry had made a pendant with a barrel bead, but I didn't have an barrels and I wanted my arrow to go through a heart. I found this bead in my stash (I made it of course) and thought it would be fun to try a horizontal design. You can see a sad back end for sure. I needed a larger loop in the front or a longer wire in the back to make a good pin, but it is a first try. 

Wednesday, January 9, 2013

New Year's Resolutions - Jewelry

My New Year's Resolution this year for my bead business is to focus on my jewelry and have a greater turn around at the gallery I have my work in, Up Front in Issaquah Washington.When I saw Kerry Bogart's new e-course, Aspire to Wire, I knew I would have a good start. I have admired her work for a long time and own her books, so I know that she does a great job at teaching in the written form. She is posted a new project every day for a month.

I'm a little behind, it started on Monday, but my wire order did not get here until today. I'll be posted my new jewelry here on my blog.

The jewelry may or may not be in order of that in the course, but I'm hoping to tweak and be inspired to try new things.

Aspire To Wire Day one, Go Team Bangle - I used Seahawks colors of bright green and blue. I wanted to add some of my lampwork, but didn't have a green or blue that matched so choose some red beads (even though there is no red in Seahawks). I think they really pop on this bangle. I forgot to order silver colored wire (and didn't want to use sterling on a practice bangle) so used gold colored. I think silver would look better. One really appealing design aspect is that this could be adjustable for different sized wrists.

Saturday, August 25, 2012

Bead Soup Part Blog 6.3


The day is here, the reveal of the 3rd episode of the 6th Bead Soup Party Blog. What is a Bead Soup Party Blog? Well, with the organization of the talented Lori Anderson 400 beaders are paired up in couples, beads are sent and jewelry is created.  On the designated day, the photos of all the creations are posted on the blogs. The rules are that you have to use the clasp and the focal. 

My partner is Lynn Davis (check out her Blog to see what she made with my beads and her Etsy Shop to check out more of her items. She makes really lovely hand-cast pewter items. For a look at what she sent me, scroll down on my blog or hit this link.


The focal piece in the necklace pewter with resin over a pink and orange flower design.  Since I make my own glass beads I made some to match this lovely focal point. I used Bullseye glass to make bright orange and pale pink beads and some transparent pink beads. I used iron wire to wrap the beads and string the piece together. I thought the iron wire looked better with the pewter than the sterling I normally work with. Of course it would have looked even better if I had remembered to sand down the iron to get some of the black off. DUH. I tried to do this after the fact and wasn’t super successful. You can see one silver piece of wire on the top right of the photo. This little bit I had sanded weeks before in a class, it was only as I grabbed this piece that I realized I had forgotten to sand the rest (it was the last piece I grabbed). AUGH The wire looks way too dark with the pewter. I did use some ink to patina the pewter so it matched the wire a bit better.The ribbon I got in the last party blog exchange.


For the clasp I made a bracelet.  When I opened my package and saw the picture jasper stone beads that Lynn sent, I knew which lampwork bead I was going to use. When ivory glass touches other glass that has fine silver in it, the ivory curdles and forms darker areas which look a lot like this picture jasper. I used some other green lampwork beads I made with some seed beads, brass beads, copper wire, pearls, ceramic beads and pressed glass beads to made this bracelet. I used Lynn’s lovely pewter heart with a copper patina as a drop near the clasp.  As always I made the bracelet way too big (I have this problem with all my bracelets). I also made the strands with the wire wrapped section too long and they flop about. I thought it would work better than it does. I will likely restring those. Overall I’m happy with this bracelet but it sure is heavy! 

Check out all the other participants showing off their work today....

Hostess, Lori Anderson, Pretty Things

Agi Kiss, Moonsafari Beads 
Alice Peterson, Alice Dreaming
Alison Sachs, Beads by Earthtones
Amanda Dittloff, Passion Smashin'
Andra Marasteanu, Bijoux de Monanage
Angie Szlovak, SweetBeads
Anitra Gordy, Leelu Creations
Ann Sherwood, Ann's Blog
Arlene Dean, A Glass Bash
Audrey Belanger, Dreams of an Absolution
Barb Solem, Vivi Magoo Presents
Barbara Blaszczyk, laboratorim Flory
Bianca Odenthal, Zydies Glasperlen
Birgit Klughardt, GitesBeads
Bobbie Rafferty, Beadsong Jewelry
Bonnie Coursolle,  Jasper Gems
Cece Cormier, The Beading Yogini
Charlene Jacka, Clay Space
Cherrie Fick, En La Lumie're
Cheryl Foiles, Get Your Bead On
Christie Murrow, Charis Designs Jewelry

Christina Miles, Wings n Scales
Christina Stofmeel, Feng Beads
Christine Stonefield, Sweet Girl Design
Cindy Cima Edwards, Live to Design
CJ Bauschka, 4 His Glory Creations
Claire Smith, Embergrass Jewelry
Cynthia Riggs, Cynth's Blog
Dawn Pierro, Turtle Moon Designs
Dee Elgie, Cherry Obsidia
Donetta Farrington, Simply Gorgeous

Dot Lewallwn, Speedie Beadie
Eileen Snyder, Dorset Hill Beads
Elizabeth Bunn, Elizabeth Beads
Evelyn Duberry, Sheba Makeda
Fay Wolfenden, Torch Fairy
Geneva Collins, Torque Story
Grace Dorsey, Fan of the Flame
Gretchen Nation,  Art Food Lodging

Hannah Annear, Squintessential
Hajer Waheed, My Beaded World
Heather Goldsmith, As I Bead It
Heather Otto, The Craft Hopper
Heidi Kingman, My Bead Therapy
Hope Smitherman, Crafty Hope
Isolina Perez, Isolina Perez
Jacqueline Keller, CreARTelier
Janeen Sorensen, Wild Vanilla Designs
Jean Peter, Jean P. Designs

Jennifer Judd, Jen Judd Rocks
Jennifer L Justman, Soul's Fire Designs
Joanna Matuszczyk, Bizuteria z filcu
Joanne Brown, Jo's Jewels
Joanne Lockwood, Jo Bunkum
Joyce Becker, Joyce's Joyful Gems
Judy Riley, Three Red Beads
Karen Mitchell, Over the Moon Design
Karen Williams, Baublicious
Karin von Hoeren, Creative Ideen

Karla Morgan, Texas Pepper Jams
Kate Richbourg, We Can Make That at Home

Katrin Lembke, AllesPerle
Kathy Combs, Torched in Texas
Kathy Lindemer, Bay Moon Design
Kay Thomerson, Kayz Kreationz
Kelly Hosford Patterson, Traveling Side Show

Klaudette Koon, Only Road
Laura Guenther, Blue Antiquities

Laurie Lalonde, Simply Mod Jewelry
Lilik Kristiani, Soul of My Embodiment
Linda Younkman, Lindy's Designs
Lisa Chapman, Beach Cat Beads
Lisa Lodge, Pine Ridge Treasures
Loretta Carstensen, Designs by Loretta
Lori Bergmann, Lori Bergmann Design
Lupe Meter, Gem's PC Corner
Lynn Davis, LLYYNN

Malin de Koning, Beading by Malin
Mandi Effron, Craft-o-licious
Mandy Williamson, Mimi's Beading
Margot Potter, The Impatient Crafter
Maria Rosa Sharrow, Willow Street Shops
Marianne Baxter, Simply Seablime Jewelry
Marina Dobrynina, Savon Feutre
Marjolein Trewavas, Room for Change
Marelene Cupo, Amazing Designs
Marsha Neal, Marsha Neal Studio

Marta Kaczerowska, uhuhu
Mary Govaars, MLH Jewelry Designs
Melissa Trudinger, Bead Recipes
Menka Gupta, Menka's Jewelry Blog
Michelle Burnett, Reverie and Revival
Michelle Escano-Caballero, The Cabby Crafter
Miko Wiropati, Uniquely Yunikua
Mimi Gardner, Other Curiosities
Miranda Ackerley, MirandackArts
Natalie McKenna, grubbi

Noemi Baena, fuego, metal, y color
Pam Ferrari, Ferrari Originals
Penny Neville, Copper Penny
Rachel Baron, R. Baron Designs
Rachel Myers, Rockabead Jewelry
Rebecca Anderson, Song Beads
Rebecca Sirevaag, Becca's Place
Riki Schumacher, Riki Jewelry

Rose Binoya, Ahtee's Blog
Rossana De Gaspari, Rdegas Blog
Sally Anderson, Wild Sally Road
Sandi James, Do Be Do Bead Do
Sandi Volpe, Sandi Volpe
Sandra Wollberg, City of Brass Stories
Sarah Goode, Pookledo

Sarah Small, blog by salla
Shai Williams, Shaiha's Ramblings

Sheryl Stephens, Babble Bead
Shiraz Biggie, Secret Song Designs
Solange Collin,  Ahowin Handcrafted Jewelry
Sonya Stille, Dreamin' of Beads
Stephanie Dixon, The Dixon Chick
Susan Kennedy, Sue Beads
Susan Sheehan, Strands of Thought
Suzann Sladcik Wilson, Beadphoria
Sweet Freedom, Sweet Freedom Designs
Tabatha Dinger, Modernly Created

Tanya Boden, Fusion Muse
Terri Gauthier, Blooming Ideas
Terry Carter, Tapping Flamingo
Tracy Stillman, Tracy Stillman Designs


Sunday, August 5, 2012

Classes are fun!


Last week I went to the International Society of Glass Beadmaker's convention and in the three days prior to the convention I took a class from Robert Dancik. It was a lot of fun. We learned about Faux Bone (the first two pieces (the bail portions that are white) and also concrete (last huge piece). This last piece has a copper box we made and a bone bead and skull button I made in Michelle Goldstein's class. You can see I added pearls around the box to mimic the dots around the button. I think there is something here as far as design goes, but it it is a little bit too big.

Monday, July 30, 2012

Evolution of a Bead Style by a Bead Artist


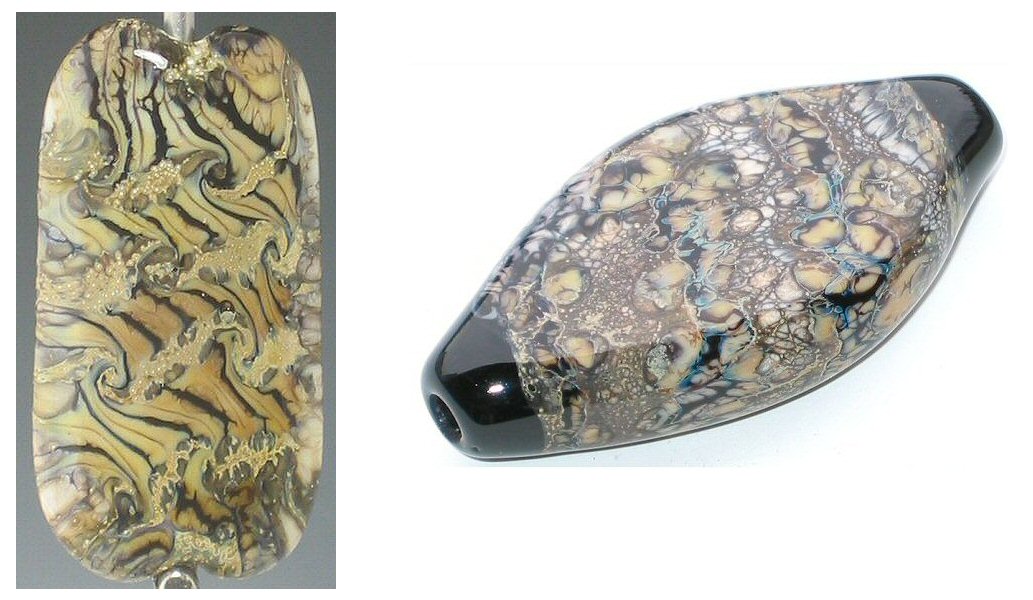
This blog post will talk about how the bead on the left evolved into the bead on the right (with a few beads in-between).
This last week I attended the International Society of GlassBeadmaker’s (ISGB) annual convention in Bellevue Washington. This was the 20th year anniversary and the theme was Evolution. We had several presenters showing the evolution of their work. I have been meaning to show an evolution of a particular favorite bead of mine since I started blogging, but keep putting if off. Listening to their presentations has motivated me to share the evolution these beads. 

The bead on the left above is the earliest photo of a bead I made with intense black (IB) webbing. I know I made some earlier, but I got my camera around this time. Jim Smircich made this effect popular. Sadly I could not find a current website for him, but you can still buy a book by Jim Kervin on his techniques multiple places, just look for the title:The Classic Bead Shapes of Jim Smircich and his Amazing Control of Heat.  I took a class from Jim and also one from Kimberly Affleck where I learned more about using IB.  Frequently done on ivory, I liked to use IB on color as seen in the copper green and sunrise coral below.  (The initial photo above is the very first sample rod I had of opal yellow (OY). The bead was made with the original ½ rod sample we were given when it first came out. I got a great little bit of pink on the top of the bead (that original OY was very reactive.)
As you can see the IB is not spreading much. I was working on a hot head (HH) at this time and the heat was not really enough to get the IB to spread. I also suspect I was using too much IB.  I did get some great color on that coral bead though!


At the same time I also made the beads above These beads have a twisty over silvered ivory bead and twisted with a rod of manufactured aventurine blue. I liked the blue/green reactions I was getting with these beads a lot. I didn’t made too many of these because someone when I asked for a critique said the transparent brown areas looked like worm holes. This is one of those beads that I think about trying again now that I have a few more years under the belt.
I found the photo above when searching for beads to use on this post and had forgotten this bead of intense black and white over silvered ivory.  I think this maybe a twisty, but I cannot tell, it also maybe blobs of glass melted in. I wanted to get the great spreading of IB over the bead to get that really lacy patterned that I saw in others’ beads, but on the HH I just couldn’t do it. 


One day I picked up the very tiny last piece of original OY I had. It was maybe an inch or two long and I wanted to use it was not sure what to do with it. Given the neat colors I was getting out of my IB beads and from that original bead I wanted to use it again, so I made a twisty out of a thin layer of IB and OY. I put it on top of an ivory bead with silver leaf and out of the kiln came my favorite bead I had ever made up until that point. The colors I got were amazing. Check out the pink flush on the OY and the blues lines in the bottom. Not knowing that all future batches of OY would not be the same, I sold this bead. Oh how I wish I still had this bead. Every bead I made in this style after this bead was an attempted to recreate this bead and they were not a success. This was one of the first beads that people asking how I made it.

I moved onto my current torch a mini CC and this bead style did not work. The heat of the torch was so much hotter than the HH and the OY and IB twisty would disappear as the ivory glass encroached over the top. While still interesting these beads didn’t have enough color for me. Very disappointed that I couldn’t get the same look on my mini cc I thought about what to do. 

 After taking a class from Michael Barley I decided to use cobalt blue glass with silver foil/leaf on top of it to create the reaction I liked but keep that base glass from spreading up over the twisty. This was a great solution. It added more color to my bead and was a popular style of my work. I even wrote a tutorial on how to do this bead for the first addition of The Glass Bead that had tutorials; summer 2008. The top left bead is the bead made in that tutorial. If you are an ISGB member, you can see the tutorial at this link: ISGB MEMBER TUTORIALS.
About two years prior to the tutorial I was starting using the wonderful silver glasses from Double Helix (DH). I got hooked on their rainbow colors and iridescent finishes. I made beads with the OY and IB twisties over Kronos (as I liked the blue color I was getting from Cobalt) and I was not happy with the results. There was too much blue and it fumed the OY darker than I wanted. I was using the DH glass mostly in small beads and with ivory and of course I liked the reaction I was getting between the silvered glass and the ivory.

This is an early set of Gaia and light ivory.
One day I thought I should just made my twisty for the surface of the bead out of silvered glass so I wouldn’t have to use my leaf/foil on the base bead and then I could switch the base back to ivory as in my original beads. I found long beads easier to make out of ivory as it is so soft and the glass moves down the mandrel better when I let heat and gravity help create the long bead. The bead above was the first bead I made with my new technique. I liked the reaction I got from the ivory and the glow from the silvered glass. I did think that the dark ivory reaction was overwhelming the bead, so I moved to light ivory (Vetrofond).
I made this bead with the light ivory and I was hooked. I really liked the little cells created as the silvered glass (Gaia) reacted with the ivory.  I received nice compliments on the internet lampworking boards about this bead and from Jed whom creates the DH glass. I was really pleased with the kudos and with the style of beads I was creating.

This is a gallery of similar beads in this style. From top to bottom and left to right: gaia, nyx, psyche and gaia. I don’t know how I got these purples from Gaia in the last bead, but every bead since this has been an attempted to replicate that bead. This is another bead I wish I never sold.

It is hard to believe I have been making this style since 2006, it doesn’t seem like that long. I have moved to other styles and don’t make these that often, but did make many for the convention this weekend and several people got some in trade or purchased and it made my day that people like my style of beads. I had a lot of people say that these are the beads they think of when they think of me and I do too.

In 2007 when this type of bead bead was still fairly new for me there was a call for entries from ISGB for a new collaboration exhibit. As seen before on this blog, my dad and I often collaborate and this was our entry for Connextions.

As for the first bead on the top of this post (another view of the same bead here), it was the bead I made specifically for and was accepted the ISGB Perspectives exhibition in 2009. It traveled over the US and went to the Kobe Lampwork Glass Museum in Kobe Japan. It was featured in the museum’s magazine: LAMMAGA.  Guess what? This bead I saved and did not sell. 

I really like thinking about how a design came about and I can see a direct line between the two original beads and I hope you can too. If you read this far, thank you so much.